Fortunately, there is a way to set up the Mail app to access Yahoo! Business Email. In techie's terms it's called going through IMAP (Internet Message Access Protocol). All you need are the IMAP parameters and some patience to go through a few easy steps.
Here are the basic information you will need to set things up. For those who are technically savvy, this is all you need. Otherwise, read on for the step-by-step direction.
Incoming Mail (also known as IMAP in technical terms):
- Server: imap.mail.yahoo.com
- Port: 993
- Security: SSL
- Server: smtp.bizmail.yahoo.com
- Port: 465
- Security: SSL
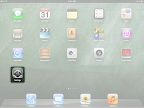
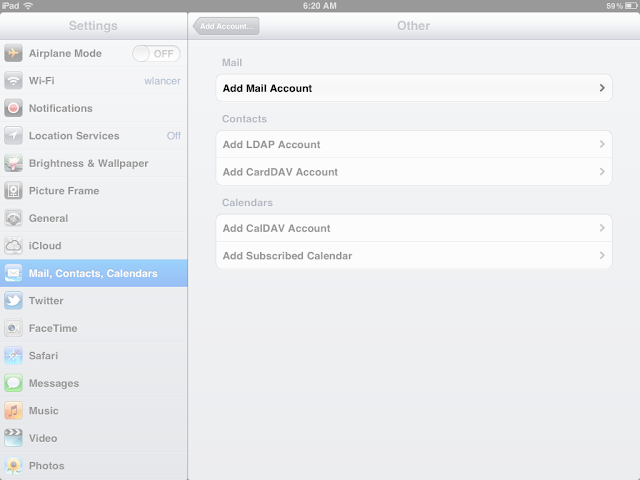
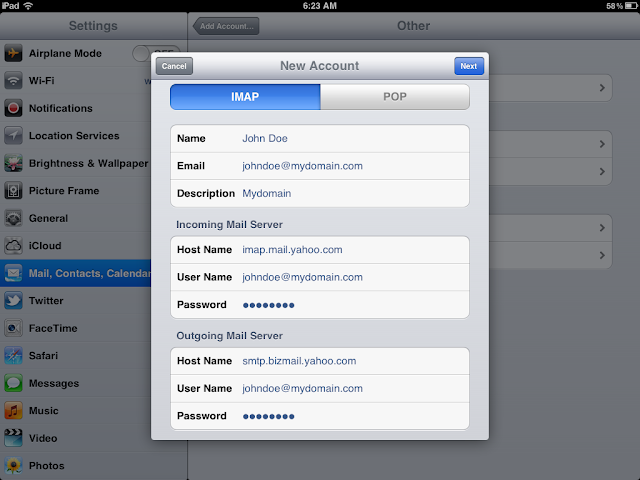
- Go to Settings, select Mail, Contacts, Calendars and tap on Add Account....
- In selecting the type of account, DO NOT select Yahoo!, but instead select Other.
- Tap on Add Mail Account under the Mail section.
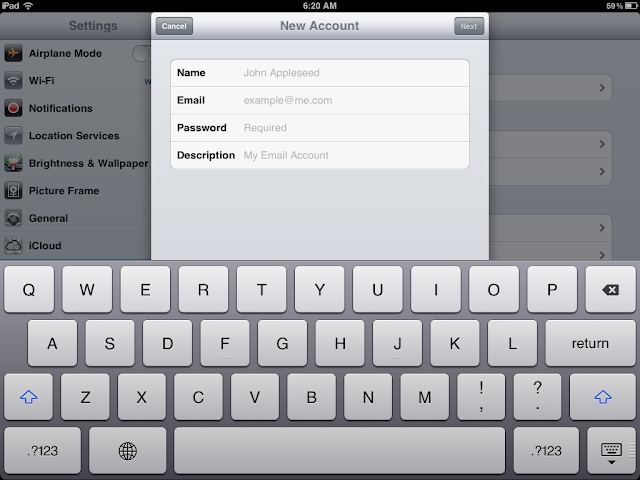
- Enter your Name, Email, Password, and a short description (this is what shows up in the list of accounts when you go to Mail later on) for this account then tap on Next.
- Name (Your name)
- Email (Your email address)
- Password (Your password)
- Description (A short description for this account, this is what shows up in the list of accounts when you go to Mail)
- On the next screen, make sure IMAP is highlighted on top and then enter the following:
- Incoming Mail Server
- Host Name: imap.mail.yahoo.com
- User Name: youremail@yourdomain.com (make sure you enter the entire email address here)
- Password: your password
- Outgoing Mail Server
- Host Name: smtp.bizmail.yahoo.com
- User Name: youremail@yourdomain.com (make sure you enter the entire email address here)
- Password: your password
- On the next screen, turn off Notes because Yahoo does not support synchronization of notes.
- Tap on Save and you should be set to receive messages on your device.
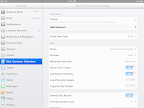
- Once your mail is set, you can make a few fine adjustments to the settings to make sure messages you send from your device will show up in your Yahoo mail on the web. To do this, go back to Settings, select Mail, Contacts, Calendars again and tap on the account you just created (the account name is whatever you entered in the Description field in step 4 above).
- Tap on your email account.
- Go to the bottom and tap on Advanced.
- Under the Mailbox Behaviors section, tap on Drafts Mailbox.
- Select Draft under the On the Server section. (If it’s set to Drafts under On My iPad, your drafts will stay on your iPad and you will not see them on the Yahoo web site.) If you do not see the On the Server section, you might have to open up your mailbox first to have Yahoo tell your device which folders there are in your account. To do this, go to iPad Mail and under Accounts, select your Yahoo account. This will bring the data in and then you can go back to this step under settings.
- Similarly, tap on Sent Mailbox and select Sent from the On the Server section.
- Do the same thing for Deleted Mailbox and set it to Trash under the On the Server section.
- Now go down to the Incoming Settings section and turn on Use SSL. This will make sure the messages are delivered to you securely (prevent hackers from seeing your messages).


To enable Push Mail:
- Go to Settings, select Mail, Contacts, Calendars and tap on Fetch New Data.
- Turn on Push if it’s not on already.
- Tap on Advanced
- Select your Yahoo account and set the option to Push (or whatever method suits you).
That's it for setting up your Yahoo! Business Email on your iOS device!
No comments:
Post a Comment